Developer Tools
![]()
📖 Documentation: https://yaravind.github.io/dev-tools/
One command to bootstrap a productive macOS and Windows environment for software and data engineering development. From a fresh machine to fully equipped in minutes. ✨ Several scripts and configurations in this repository were meticulously crafted through vibe coding powered by GitHub Copilot and Google Gemini.
Setting up a new machine is tedious. Hunting down the right tools, configuring shells, managing Java versions, wiring up your IDE; it takes hours and rarely produces consistent results. This project captures battle-tested scripts and configs so you can reproduce a complete, opinionated developer environment on Apple Silicon (M1/M2/M3/M4) in one run.
Features
| Benefit | Detail |
|---|---|
| ⚡Fast bootstrap | Install and configure 30+ tools with a single command |
| 🔁Reproducible | Identical setup across every machine, every time |
| 🧰Curated toolset | Hand-picked CLI utilities, JVM toolchain, Python/Rust, LLM tools, and modern IDEs |
| 🔧Shell-ready | Pre-wired.zshrc with aliases, helpers, and prompt tweaks that survive reboots |
| 📊Data & ML friendly | Includesuv, mamba, conda, Python, cloud CLIs, and ollama for local LLMs out of the box |
Setup Instructions
macOS (Apple Silicon M1/M2/M3/M4)
Warning
- The script is tested on Apple M2/M3/M4 Pro (should also work on M1) and zsh shell.
- Type
bashand hit enter. If you see the error “Bash is required to interpret this script”, change tobashshell as Homebrew install script uses bash.- If you haven’t already installed Xcode Command Line Tools, you’ll see a message that The Xcode Command Line Tools will be installed.
Check the output below to see if the Command Line Tools are installed:
    ==> Searching online for the Command Line Tools
    ==> /usr/bin/sudo /usr/bin/touch /tmp/.com.apple.dt.CommandLineTools.installondemand.in-progress
    ==> Installing Command Line Tools for Xcode-15.3
    ==> /usr/bin/sudo /usr/sbin/softwareupdate -i Command\ Line\ Tools\ for\ Xcode-15.3
    Software Update Tool

    Finding available software

    Downloading Command Line Tools for Xcode
    Downloaded Command Line Tools for Xcode
    Installing Command Line Tools for Xcode

    Done with Command Line Tools for Xcode
Steps
- If your Mac is managed (work or school) then try to get an admin account and switch user. For e.g. if the admin
account is
admin_acctthensu admin_acctand enter the password for that account with higher privileges - Install Homebrew (Pre-requisite)
- Clone this repo:
git clone https://github.com/yaravind/dev-tools.gitor download as zip (Pre-requisite) - cd dev-tools
- Make
setup_env.shexecutable: chmod +x scripts/macos/setup_env.sh scripts/macos/jenv_setup.sh scripts/macos/git_setup.sh scripts/macos/gen_dock_apps.sh scripts/macos/dock_setup.sh - Run: ./scripts/macos/setup_env.sh
- Copy
.zshrc(or.bashrcbased on your shell) to home directory: cp config/.zshrc ~/ and run source ~ /.zshrc - Run ./scripts/macos/jenv_setup.sh to add JDK
- Run ./scripts/macos/git_setup.sh to setup Git Credentials
- Run ./scripts/macos/dock_setup.sh to setup macOS Dock
Minimal setup for Spark/Scala/Java development
A lightweight bootstrap script (scripts/macos/setup_env_min.sh) is available for getting a Spark/Scala/Java development environment up and running quickly, without the full suite of tools installed by setup_env.sh. It installs Git, a JDK, Maven, VS Code, and IntelliJ IDEA.
- Install Homebrew (Pre-requisite)
- Clone this repo:
git clone https://github.com/yaravind/dev-tools.gitor download as zip (Pre-requisite) - cd dev-tools
- Make the script executable: chmod +x scripts/macos/setup_env_min.sh
- Run: ./scripts/macos/setup_env_min.sh
- Run ./scripts/macos/vscode_setup.sh to install required (and some optional) VS Code extensions. The list is in
config/vscode.txtif you prefer to add or remove extensions. - (Optional) Launch IntelliJ IDEA once to complete its first-run setup
Warning (on macOS)
Your terminal does not have App Management permissions, so Homebrew will delete and reinstall the app. This may result in some configurations (like notification settings or location in the Dock/Launchpad) being lost. To fix this, go to System Settings > Privacy & Security > App Management and add or enable your terminal.
Windows (10/11)
Requirements
- Windows 10 (version 1809 or later) or Windows 11
- winget (App Installer) — pre-installed on Windows 11; available from the Microsoft Store on Windows 10
- PowerShell 5.1 or later (PowerShell 7+ recommended)
Steps
- Clone this repo:
git clone https://github.com/yaravind/dev-tools.gitor download as zip (Pre-requisite) - Open PowerShell as Administrator
- Allow script execution for this session: Set-ExecutionPolicy Bypass -Scope Process -Force
- cd dev-tools
- Run: ./scripts/windows/setup_env.ps1
- Restart your terminal to apply PATH and environment variable changes
- Run ./scripts/windows/jenv_setup.ps1 to register installed JDKs with JEnv-for-Windows
- Run ./scripts/windows/git_setup.ps1 to set up Git credentials (name and email)
Minimal setup for Spark/Scala/Java development
A lightweight bootstrap script (scripts/windows/setup_env_min.ps1) is available for getting a Spark/Scala/Java development environment up and running quickly, without the full suite of tools installed by setup_env.ps1. It installs Git, a JDK, Maven, VS Code, and IntelliJ IDEA.
You can run the script in Silent (default), Interactive, DryRun, or Help modes:
- Silent mode (default): Installs all tools without prompts.
.\scripts\windows\setup_env_min.ps1 # Or explicitly: .\scripts\windows\setup_env_min.ps1 -Silent - Interactive mode: Prompts for installer UX and confirmations.
.\scripts\windows\setup_env_min.ps1 -Interactive - DryRun mode: Shows what would be done without making any changes (useful to preview).
.\scripts\windows\setup_env_min.ps1 -DryRun # Preview interactive mode UX without making changes: .\scripts\windows\setup_env_min.ps1 -DryRun -Interactive - Help mode: Prints a short usage message and exits.
.\scripts\windows\setup_env_min.ps1 -Help
- Clone this repo:
git clone https://github.com/yaravind/dev-tools.gitor download as zip (Pre-requisite) - Open PowerShell as Administrator
- Allow script execution for this session: Set-ExecutionPolicy Bypass -Scope Process -Force
- cd dev-tools
- Run the script picking one of the options, Interactive or Silent, as shown above
- Restart your terminal to apply PATH and
JAVA_HOMEchanges - Run ./scripts/windows/run_vscode_setup.ps1 to install required (and some optional) VS Code extensions. The list is in
config/vscode.txtif you prefer to add or remove extensions. - (Optional) Launch IntelliJ IDEA once to complete its first-run setup
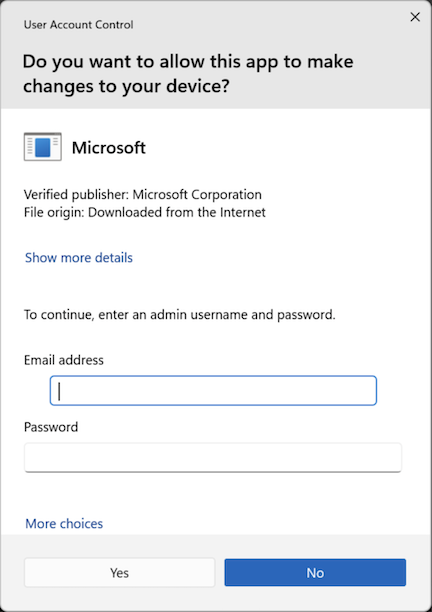
Running the above script might open a popup like below for your approval. Select Yes.
Rollback Instructions
If you need to revert the changes made by the minimal setup scripts, you can use the provided rollback scripts. These scripts will uninstall the applications and remove the configuration files created by the setup scripts.
macOS
- Open your terminal
- cd dev-tools
- Make the script executable: chmod +x scripts/macos/setup_env_min_rollback.sh
- Run: ./scripts/macos/setup_env_min_rollback.sh
Windows
- Open PowerShell as Administrator
- cd dev-tools
- Run rollback (silent by default): .\scripts\windows\setup_env_min_rollback.ps1
Optional modes:
- Preview what would be removed (no changes): .\scripts\windows\setup_env_min_rollback.ps1 -DryRun
- Interactive mode (prompts you to select which tools to uninstall first): .\scripts\windows\setup_env_min_rollback.ps1 -Interactive
- Explicit silent mode: .\scripts\windows\setup_env_min_rollback.ps1 -Silent
FAQ
See faq.
Scripts
See scripts for a complete table of scripts and descriptions.
Other
For Git aliases, package management tips, IntelliJ integration, and more, see details.
Use at Your Own Risk. This project is provided as-is, without warranty of any kind, express or implied. By using these scripts and configurations, you accept full responsibility for any changes made to your system, including but not limited to software installation, configuration modifications, and system settings. The repository owner(s) and contributors shall not be held liable for any damage, data loss, security vulnerabilities, or other consequences arising from the use of this project. Always review scripts before executing them on your machine.